 Drupal is an open source content management platform powering millions of websites and applications. Drupal CMS is free software that allows you to easily organize, manage, and publish your content, with an endless variety of customization. Thousands of Drupal add-on modules and designs let you build any website you can imagine, from personal blogs to enterprise applications.
Drupal aims to provide a slim, powerful core that can be readily extended through custom modules. High quality, elegant, documented code is a priority over roughed-in functionality. It supports established and emerging standards. To ensure excellent performance, Drupal puts a premium on low-profile coding (for example, minimizing database queries). This CMS aims for a high standard of usability for developers, administrators, and users.
You can easily install Drupal CMS and get it hosted in the cloud using Jelastic PaaS automated deployment or following the steps of manual installation within an intuitive UI.
Drupal CMS Automated Deployment
If you don’t have a Jelastic PaaS account yet, you can automatically register and deploy Drupal CMS. Within the opened widget, specify your contact information, and press the Install button.
If you are already a registered Jelastic PaaS user, you can directly install Drupal CMS from the Jelastic PaaS Marketplace via the dashboard.
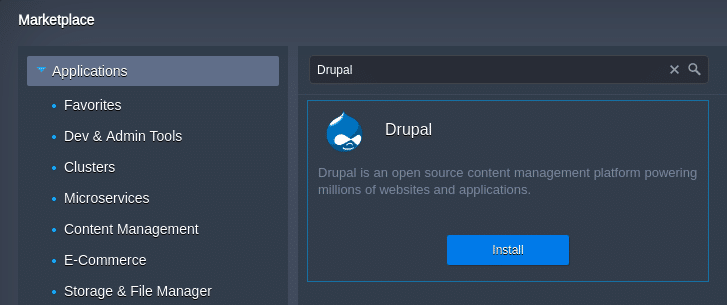
As a result, a new environment with Apache PHP application server and MySQL CE 5.7 database will be automatically created, and the latest Drupal CMS version will be installed.

The automatic deployment sources can be found at the Jelastic PaaS JPS collection on GitHub.
Drupal CMS Manual Installation
In the guide below, we’ll go through the manual steps required to get your Drupal CMS application up and running in the cloud.
Create Environment
1. Log into your Jelastic PaaS account and click the New Environment button at the top left corner.

2. Within the opened topology wizard, switch to the PHP tab and choose the required application server and database stacks (Apache PHP and MySQL 8, in this example).
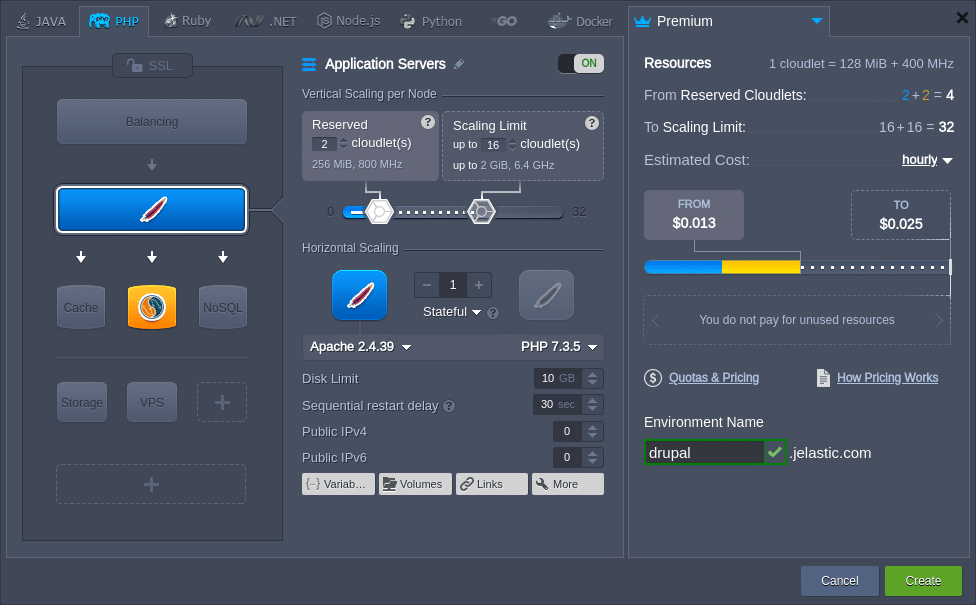
Configure other parameters (disk limit, public IPs, regions, etc.) up to your needs and click the Create button.
3. After your environment creation, click the Config button for the application server.

4. In the opened configuration file manager, use the php.ini shortcut in Favorites to quickly access and edit the file. You need to adjust several PHP extensions to support the Drupal installation (use the search field to quickly locate the required extensions):
- Enable extension=gd.so and zend_extension=/usr/lib64/php/modules/opcache.so modules by removing semicolons at the beginning of the line;
- Disable or comment the mbstring.encoding_translation = On setting.

5. Do not forget to Save the changes and to Restart Nodes for the Apache application server to apply them.

Now, let’s create a dedicated database for your Drupal CMS installation.
Configure Database
1. Click Open in Browser next to the database node (MySQL in this example).

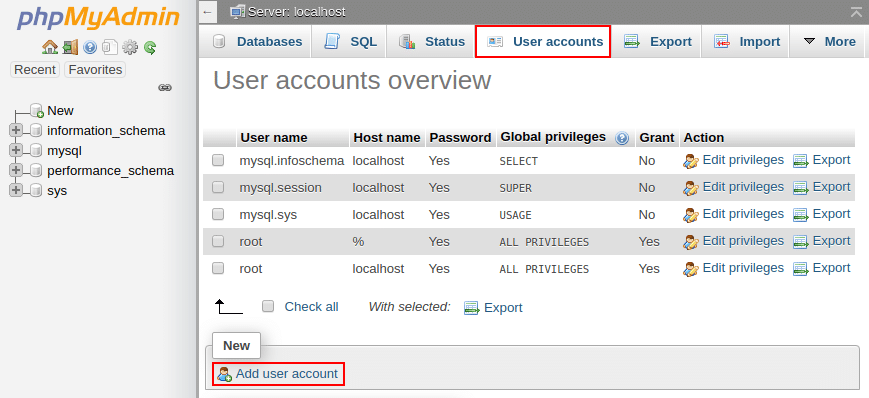
2. Log into the admin panel with the credentials from the appropriate email. Switch to the User accounts tab and click the Add user account link.
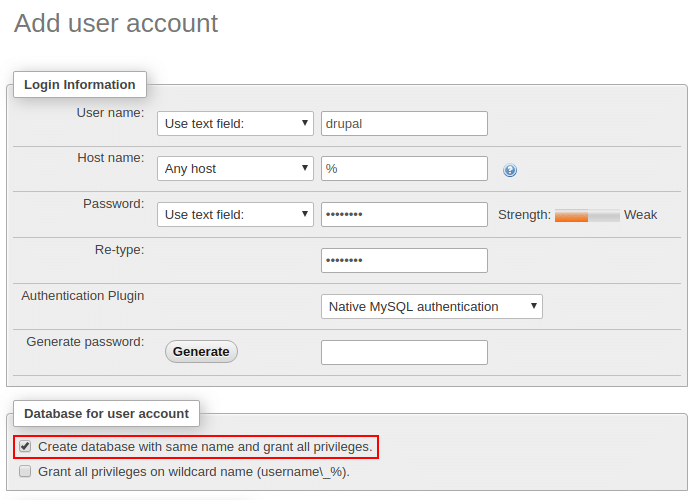
3. Within the opened form, provide User name (e.g., drupal) and Password. Tick the Create database with the same name and grant all privileges check-box and proceed with the Go button at the bottom.
Next, return to the dashboard to deploy the Drupal CMS package.
Deploy & Install Application
1. Go to the official Drupal website to get the latest version of the application package (.zip archive) or deploy it via the direct link:
https://www.drupal.org/download-latest/zip

2. To automatically resolve the required dependencies for this example, we’ll use the PHP Composer tool (pre-installed for both Apache and NGINX PHP servers) via the Post deployment hook:
cd $WEBROOT/{project_name}
composer install
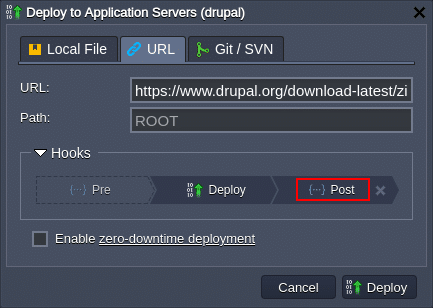
Here, replace {project_name} with the context (Path) you’ve set (ROOT by default).
3. Once the application package is deployed, Open in Browser the Drupal CMS application (either from the pop-up or next to the application server node).

4. The Drupal CMS installation configuration process is rather simple and straightforward. Within the first two steps, choose a language and a profile (e.g., English / Standard), then an automatic verification of the requirements is performed.
Next, provide the database connection details:
- Database type – choose the appropriate database (MySQL/MariaDB, PostgreSQL or SQLite);
- Database name, Database username, Database password – type the credentials, you’ve used for the database creation in the Configure Database section of this guide;
- Advanced Options > Host – host address of the used database without the protocol part (can be seen in the appropriate email).
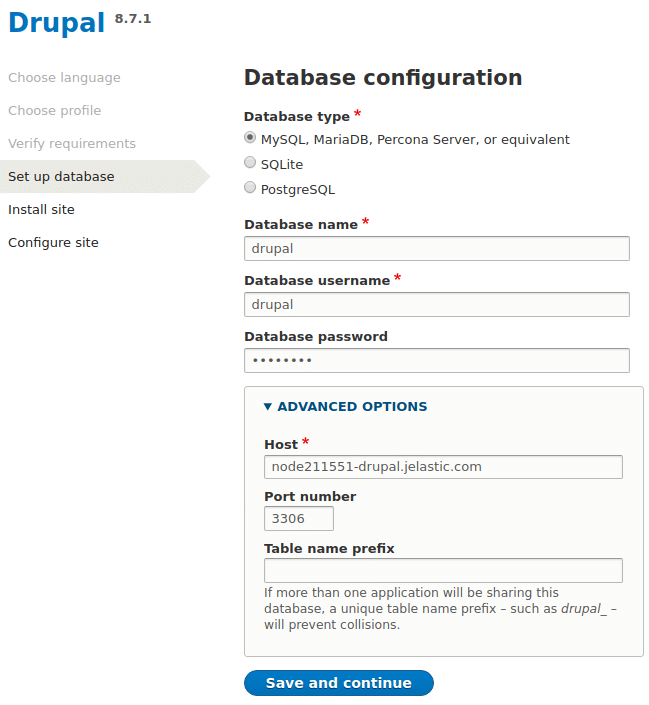
Click the Save and continue button to proceed with the installation of Drupal CMS.
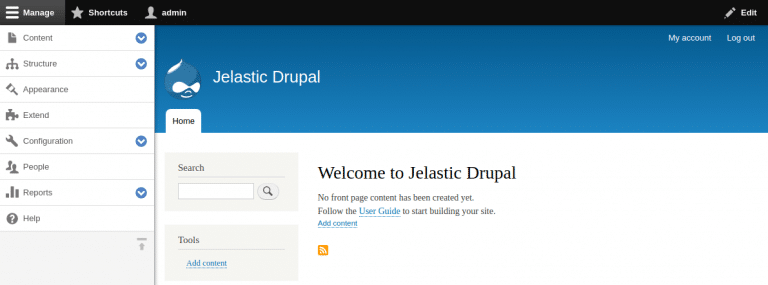
5. Finalize by providing your website information (website name, email, admin login/password, etc.). Click the Save and continue button and you will be redirected to the front page of your new website.
Drupal CMS is a perfect choice for enterprise projects with high traffic. It can be used to easily manage every aspect of your website, from adding content and images to updating a product catalogue, processing credit card payments, or taking online reservations right in the cloud. Start using Drupal CMS with a free trial account at our Jelastic PaaS platform.
